Deploying Kobweb into the Cloud
- Background
- Do you really need to run your own web server?
- Server API routes
- A quick introduction to Render
- A brief overview of GitHub workflows
- A minimal discussion of Docker containers
- CORS
- Deploying a Kobweb server
- Create a Kobweb project
- Create a new GitHub repository
- Create a Render account
- Connect Render to GitHub
- Sharing secrets
- Add a workflow
- Add a Dockerfile
- Configure CORS
- Deploy your site
- Conclusion
- Thanks!
Kobweb is a framework built on Compose HTML, a reactive web UI framework from JetBrains. It allows you to create web apps in Kotlin using a powerful API.
You can also read more about Kobweb in this earlier post.
Kobweb provides a feature called API routes. Essentially, these are functions that get called when you fetch a certain URL on your site (discussed in more detail below▼). They can be incredibly useful, but to use them, you need to have a Kobweb server running somewhere on the internet.
In this post, we'll talk about how to deploy your Kobweb project into the cloud using Render, a popular hosting service that can host and manage your web services for free.
Background
Before we dive into creating and deploying our site, let's cover some useful background information. However, if you're already familiar with these concepts, feel free to skip straight to the action▼.
Do you really need to run your own web server?
Compared to developing a full-stack app, creating a client-only site served by a static-hosting service is often faster to develop and deploy.
Static sites are always up and running non-stop (aside from occasional server outages), while cloud servers sometimes need to be instantiated or woken up. On a free hosting tier like that provided by Render, this process can take up to 10 seconds (and possibly much longer).
Additionally, static site hosting is generally more cost-effective than general cloud hosting, as static hosting servers can optimize for simple file delivery.
Surprisingly, you can create a site with a significant amount of dynamic behavior without ever writing a server. For example, services like Firebase can manage database, storage, and authentication features for you. In many cases, by writing client-side code that communicates with their APIs, you can provide an identical experience to another site that spent more time and money implementing a full-stack solution.
So when should you write a server?
Despite the above warnings, there are a few reasons you might want to write a server:
- You want to run some custom code that is only relevant for your site. For example, you might want to collect a bunch of answers from a user when they first log in and then run some custom, secret algorithm to generate a personalized experience. (Think of social media tuning their algorithms based on your preferred topics.)
- You want to write code that talks to private backend services (like a company server that stores private user data) without a client-facing API.
- You want to do some work on behalf of the user with an external service that requires a private API key for authentication (for example, the ChatGPT API). Exposing these credentials publicly is a major security issue.
- You expect your backend to act as a hub connecting multiple users (for example, a chat server).
At this point, if you're still unsure, a client-only site is likely the better choice. I discuss this approach in more detail in this post.
You can always start with a static site and migrate to a web server in the cloud later if the situation demands it.
If you're still here and undeterred, let's continue!
Server API routes
Server API routes are essentially functions that are triggered when a user fetches a URL associated with them. Below, we'll demonstrate a few concrete examples to help you gain a deeper understanding of this feature.
API routes generally come in two flavors -- read-only queries, and mutations.
For queries, GET operations are common, while for mutations, POST is useful for adding data, PUT for replacing it, and DELETE for removing it. There are several other HTTP methods you can explore, but in practice, you can achieve a lot with just GET and POST operations.
Below, we'll explore endpoints that could be used in a simple TODO app.
GET
First, let's start with declaring a simple GET query. Here's an API route that generates a unique ID, which the client can request and then use to uniquely identify themselves as a specific user moving forward:
The @Api annotation informs Kobweb that this function is an API route that should be registered on the backend.
If you tag a function with this annotation, the following two conditions must be met:
- The function must exist somewhere under the
apipackage. - The function must have a single parameter of type
ApiContext.
API methods can be marked suspend if desired. In fact, we'll be doing that on a different API route later. But here, we don't technically need it, so we choose to leave it off.
A complete discussion of the ApiContext class is beyond the scope of this post, but as demonstrated above, it includes two properties: req representing the user's request, and res representing the response to send back to them.
You could trigger the above API route by using curl and targeting https://(yoursite.com)/api/id. (Note that the name of the API route comes from the filename – here, "Id.kt" – not the name of the method!)
POST
Next, let's look at an example of a POST query:
The parameters above ("owner" and "todo") will come from URL query parameters. In other words, you could trigger the above API route with a POST request like this:
There is a ctx.req.body property which, if set on the client, would contain the body of the request. That's another approach for encoding values passed from the client to the server. However, for simplicity, we're not using it in this example.
@InitApi
In the POST example above, you might have noticed the line ctx.data.getValue<TodoDataStore>() and wondered what it is and where it came from.
The answer is that Kobweb provides a generic data object that you can populate with any collection of objects that you'd like.
Additionally, the framework includes an @InitApi annotation that you can apply to methods which will then be called whenever the server starts up. Such methods must take a single InitApiContext parameter, which, among other values, provides access to a mutable instance of data.
Let's go ahead and implement our own init method that creates a datastore class (in production, this would be backed by a database, for example). Then, we just need to register an instance of it with the data object:
Some astute readers might recognize data as the Service Locator pattern.
With our TodoDataStore instance created on startup, we can now access it using ctx.data.getValue<TodoDataStore>() within any of our @Api methods.
Connecting to API routes from the client
Once you've defined your API routes, you can talke to them from the client using the extension window.api property provided by Kobweb.
For example, for the GET method from earlier, you could access it from the client like so:
Earlier we mentioned that the route for the "id" endpoint was https://(yoursite.com)/api/id, but here we don't need to explicitly include the "api/" prefix. The window.api property handles that for you.
Learning more
Ultimately, there's more depth to API routes than what we discussed above, but this glimpse should allow you to start understanding the power afforded by this feature.
That said, you can read more about API routes in the official documentation.
A quick introduction to Render
Render is a cloud service offering a variety of useful products and features for hosting web applications. It's free for small projects, and it gained significant popularity after Heroku started charging for their previously free tier. We're using Render in this post due to its free offering.
Render provides several different services, including static site hosting. However, for the remainder of this article, we'll focus on Render's "Web Service" product.
If you're interested, you can learn more about Web Services in Render's documentation.
A brief overview of GitHub workflows
We discussed GitHub workflows in a previous blog post, so for now, we'll just repeat this first part:
GitHub Actions is GitHub's approach to automating work, which is commonly used for continuous integration. A workflow is a script which defines one or more related jobs that run together in response to some event.
We'll use a workflow below to handle exporting our site and, when done, will send out a message that pings our web hosting service Render when those files are ready to download.
A minimal discussion of Docker containers
Docker containers are way too nuanced and complex a topic to cover in-depth here. Instead, we'll cover the bare minimum needed for you to understand a later step in this post.
- A Docker container is a lightweight, executable package of software that contains everything needed to run an application in a portable way.
- When building a new Docker container, you start with a base image, which is a pre-built Docker container that you can use as a starting point. This is often very lean, such as a barebones Linux distribution.
- You can build a Docker image up in layers, where later layers can selectively copy parts from previous layers. In this manner, you can download a bunch of tools in an initial layer, which do work to generate a bunch of outputs, then selectively copy only the outputs you need into the final image. After that point, you can share the final image alone, discarding any previous layers, which saves space.
- A
Dockerfileis a text file that contains instructions for how to build a Docker image. It is common for projects to include aDockerfilein the root directory of the project so that some service can find it after syncing your project and then build the image automatically.
You may wish to read the official documentation if you'd like to understand the feature in more depth.
CORS
If you're already familiar with CORS, then we empathize with the indigestion its memory is undoubtedly causing you right now. ❤️🔥
CORS, or Cross-Origin Resource Sharing, is a security feature built on the idea that a web page should not be able to make requests for resources from a server that is not the same as the one that served the page.
The underlying security mechanism that enforces this restriction is called the Same-Origin Policy (SOP). SOP prevents malicious sites from requesting sensitive data from other sites. For example, if you visit a malicious site, it should not be able to make a request to your bank's website and then read the response to see your account balance.
SOP prevents cross-domain server requests by default. CORS offers a way to relax this policy in a controlled manner by allowing trusted exceptions.
It's important to note that not all operations are blocked by SOP. As a result, you might create a site that functions well without configuring CORS, only to encounter issues when you introduce a new feature later that requires it.
This brief introduction should give you a basic understanding of CORS and its importance. For a deeper dive, consider exploring Mozilla's documentation on CORS and SOP.
Deploying a Kobweb server
Now that we've covered the necessary background information, it's time to deploy a Kobweb server to the cloud! We'll follow these steps:
- Create a Kobweb project
- Set up a GitHub repository for our code
- Create an account on Render
- Configure Render and GitHub with secrets from each other
- Create a GitHub workflow that handles exporting our site and then pings Render
- Create a Dockerfile that will direct Render to download server artifacts from GitHub and deploy them
Admittedly, this is quite a bit of initial legwork, but once everything is in place, you'll have a project where:
- you submit a change to the
mainbranch - this triggers a GitHub runner that will export your Kobweb site and ping Render
- Render will fetch the artifacts from GitHub and deploy your site!
And the whole process should take about 5 minutes before your new site is up and running.
Create a Kobweb project
If you already have a project, feel free to skip this step. However, if you don't and want a concrete example to use while following along, we suggest getting the demo todo app for this guide.
In a terminal, navigate to a folder on your computer where you store projects and execute the following commands:
These steps should initialize your project with git. If you originally opted not to, you can manually initialize it:
This next step is optional, but to get a feel for the app before you deploy it, run it locally!
Create a new GitHub repository
Follow the official instructions to create a new GitHub repository. Choose a name that suits your project. For this guide, I used kobweb-todo-on-render, but feel free to select something more concise and appropriate for the specific project you're working on.
When given an opportunity to populate this repo with a README and .gitignore, don't! Kobweb has already created these for you.
After completing the process, sync your local project with the GitHub repo:
Create a Render account
There are several ways to create a Render account, but for simplicity and compatibility with later steps, we'll use their GitHub sign-in flow.
If you already have a Render account connected to GitHub, skip this section. If you have an account not connected to GitHub, follow these official instructions instead.
Start by visiting Render's sign up page and clicking the GitHub button:
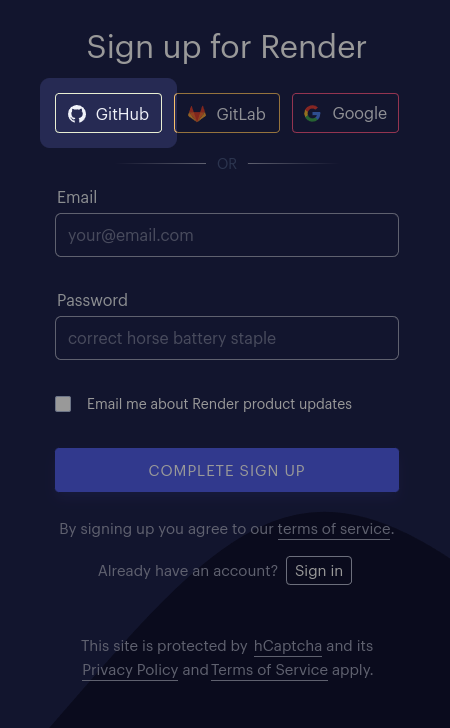
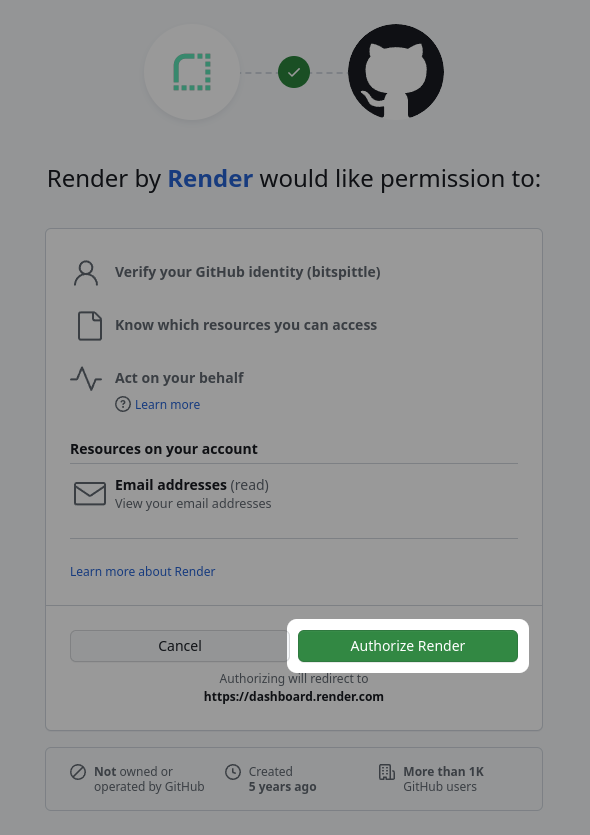
You'll be redirected to a GitHub page, where you'll be prompted to authorize Render with your GitHub account. Render is a trusted company, so this is a safe action. Click Authorize Render to proceed!
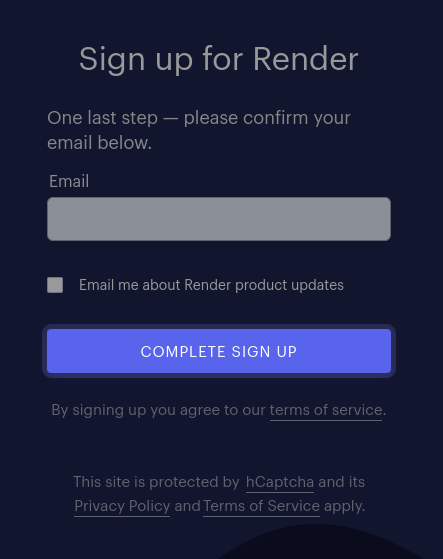
Confirm your email and click the Complete Sign Up button.
Check your inbox for an email from Render with a link to confirm your email address. Click it to be redirected to the Render dashboard.
Connect Render to GitHub
At this point, go to Render and open your dashboard.
From the options available, create a new Web Service. This will prompt you to find your relevant GitHub repo and Connect it.
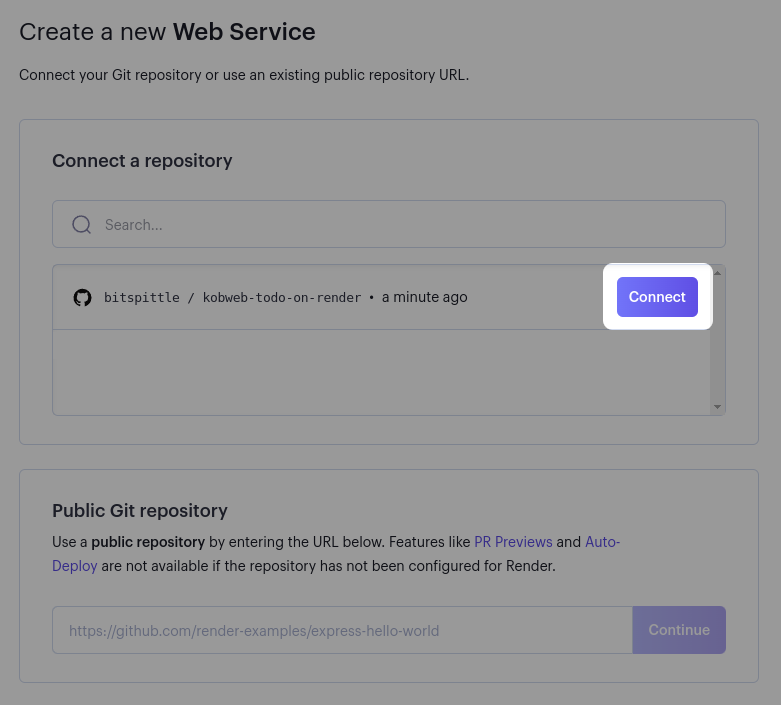
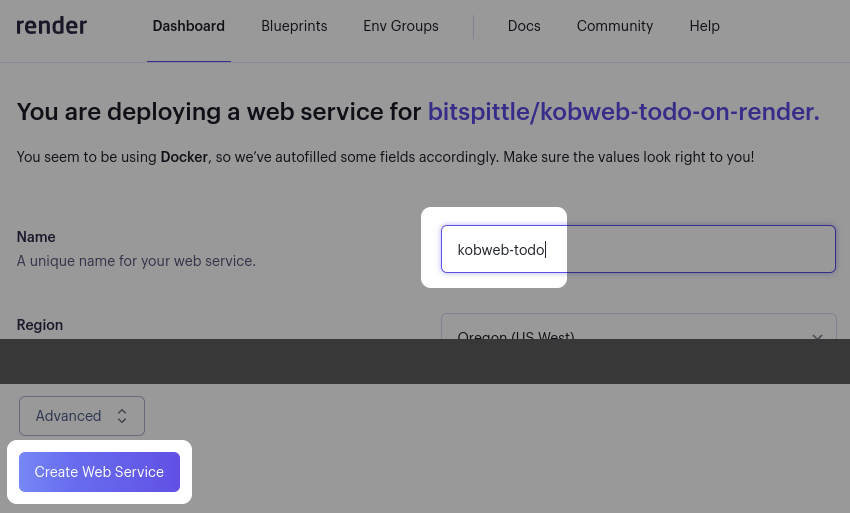
Afterward, you'll be directed to a web service configuration page. You should only need to specify the service name, as all other defaults should work fine. I used "kobweb-todo" in my case, but you will have to specify a name that's not already taken.
When ready, press Create Web Service.
Sharing secrets
We will need to generate two secrets, one from GitHub and the other from Render, which will let them talk to each other.
Secret #1: GitHub Token for read-only Actions permissions
Later in this article, we'll create a workflow that will tell your GitHub runner how to export your site and upload those files as artifacts.
To download those artifacts from Render, you will need to use a private token to authenticate the request. We will generate that now.
Although we will ultimately be creating a token that is only for use with our current project, the flow for creating it starts from your top-level user settings.
So, to begin, go to your user icon in the top right, click on it, and then select Settings:

In the left-hand menu, look for Developer Settings at the very bottom and click on it:

This will take you to a new page where you should click on Personal access tokens > Fine-grained tokens.
Then click on the Generate new token button:

Give the token a name (anything unique) and, optionally, a description:

For this case, I recommend setting the Expiration value to No expiration. However, GitHub highly discourages this, as it is a potential security risk if your secret leaks later.
That said, in this case, our key will have restricted, minimal permissions, so personally I'm not too worried about it even if mine got stolen.
However, this is not a best practice, so you may choose to give your token a lifetime (at which point you'd need to create a new one later and update Render when you do).
I also make sure the key only applies to my one repository by choosing Only select repositories and finding my specific repository in the Select repositories pull-down list.

Finally, press Add permissions and chose Actions (read-only). The Metadata permission gets added automatically by GitHub.
When all information is ready, press Generate token:

In the UI popup that appears, copy the value using the button! We'll bring it over to Render momentarily.
If you fail to save this value in your clipboard and close the popup, you'll need to go back through the token flow one more time to create a new one.

Go back to Render, and visit your new service's project page. On the left side, you should see an Environment menu item. Click on it and look for the Secret Files section.
Our goal here is to create a file that our Dockerfile will later be able to read. This is a very secure way to handle secrets in Render.
Finally, press the Add file to continue.

We need to give our file a name. We used "GH_TOKEN" but you can be more descriptive if you'd like (such as "GH_ARTIFACT_DOWNLOAD_TOKEN").
Finally, click on the button, which will open up a UI popup for entering in our secret.

Enter the secret we just copied over from our GitHub token flow!

That's it for now! Later, you'll see how we will read this value from our Dockerfile.
Secret #2: Render deploy hook URL
Render supplies a secret URL for your project which, when pinged with a POST request, will kick off a deploy. We will use this to allow GitHub to notify Render after the artifacts have been updated.
In your project's settings section, if you scroll down a little bit, you will find a Deploy area.
Make sure Auto-Deploy is set to Off (since we'll be kicking off deployments via a trigger instead). And then, press the button on the Deploy Hook line.

Let's go back to GitHub. This time, find your repository's settings (to the right of the top bar on your project page):

In the menu on the left hand side, look for Secrets and variables > Actions. Once there, click on New repository secret (found under the Secrets tab):

In the UI that pops up, give the secret a name (whatever you want, but we went with RENDER_DEPLOY_HOOK_URL), and in the Secret text area, paste the value we got from Render:

Hit Add secret and you're done!
Add a workflow
Copy the following workflow as-is into your project at .github/workflows/export-and-deploy-site.yml:
Essentially, it directs GitHub to fetch, build, and export your site in fullstack mode. This is all kicked off automatically whenever any commit is checked into the main branch. We also handle the workflow_dispatch event, which means a user can manually trigger this workflow to run from any branch.
Once the export is finished, the workflow grabs all the contents of the .kobweb folder (which has everything you need to run your server) and uploads it as a zipped artifact using the upload-artifact action.
After that is done, we ping Render using secrets.RENDER_DEPLOY_HOOK_URL. If you used a different name above when creating your repository secret earlier, then you must change it here as well!
Add a Dockerfile
Create a file called Dockerfile in the root of your project and populate it with the following contents:
You must update the REPO_OWNER and REPO_NAME arguments to valid values or your deployment will fail! Furthermore, if you named your Secret File something besides GH_TOKEN, be sure to update the name below as well.
Render will be able to find this file and execute it when a deployment is requested.
The above script looks for an artifact associated with the most recent git commit and downloads it. There is some extra complexity to support searching multiple times with exponential backoff in case the artifact is not found yet.
If you review your Render logs, you should see information that looks like the following (with real values instead of asterisks):
Kobweb works with Java 11, but the general recommendation is to use newer releases as your runtime if you can, as they might contain security fixes and performance improvements.
The eclipse-temurin image, according to its docs, was designed to be both used for running apps and also be useful as a general base foundation, which is perfect for our needs. The alpine variant is supposed to be extra slim.
There are other images out there, and you are welcome to investigate further.
Configure CORS
Return to your Kobweb project.
We need to configure our Kobweb server with the domain it will be running on.
Earlier, when you created the web service with Render, you had to choose a unique name.
Free domain names provided by Render web service hosting have the format $(servicename).onrender.com. For this guide, the name I chose reserved kobweb-todo.onrender.com.
Open and edit .kobweb/conf.yaml, then add a CORS entry to it, replacing the host name below with what your site will be:
Specifying the schemes is optional. If you don't specify them, Kobweb defaults to "http" and "https".
To test that you did this correctly, run your app (cd site && kobweb run) and open up the log file at .kobweb/server/logs/kobweb-server.log. Look for the line near the top that should say your host is registered:
If the conf file was set up incorrectly (perhaps the indentation is off), you'll instead see:
Deploy your site
We've reached the final stretch.
Add and push the CORS, Dockerfile, and workflow changes to your repo:
If you want, you can go to your GitHub project, open up the actions window, and watch the export happen live. When it finishes, it will fire a ping to Render.
Then, wait while Render follows the instructions in your Dockerfile. This process should go fairly quickly.
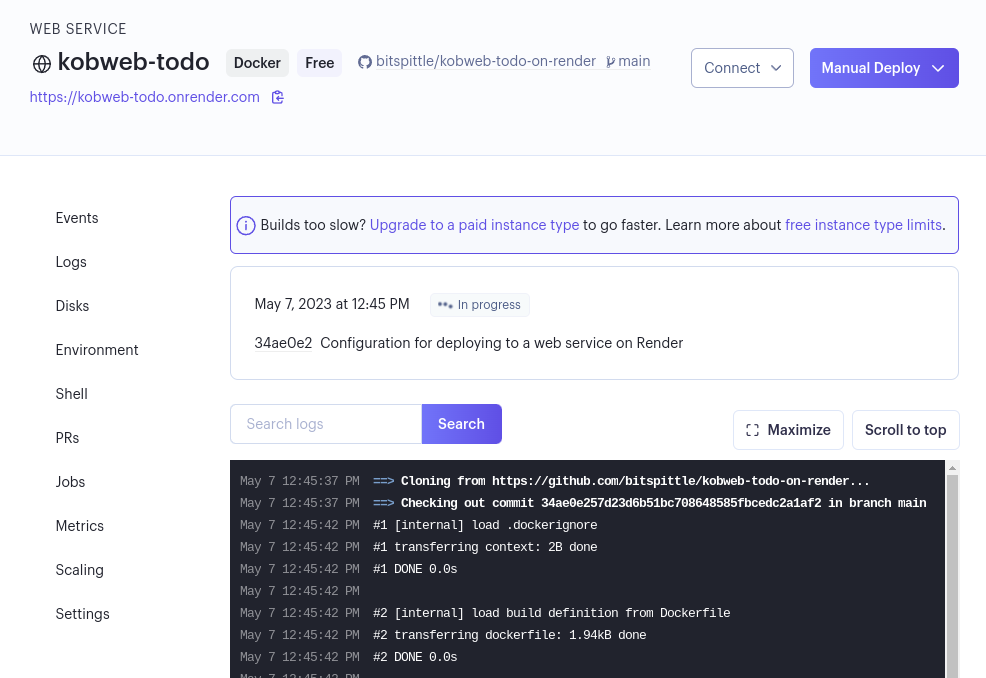
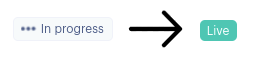
Once it's done, you should see the status switch from a grey "In progress" message to a green "Live" indicator:
Click on your web service's link to see your site in action!
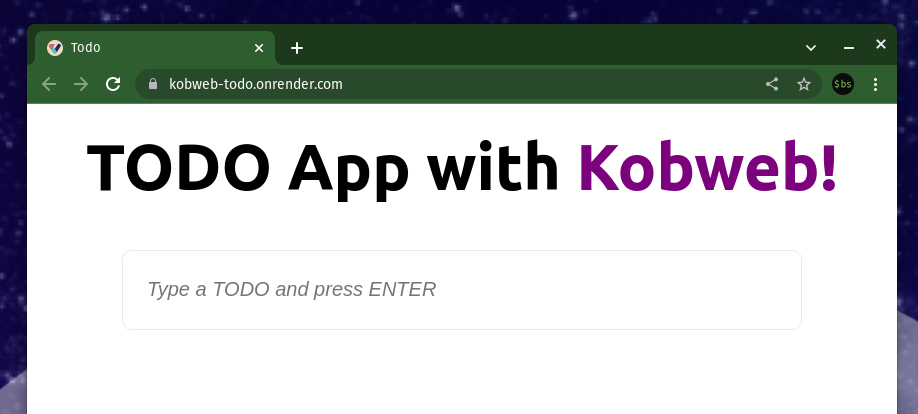
Your site might feel slow, especially during startup. That's the trade-off with a free service!
At this point, any time you push a new commit to your repo, GitHub and Render will coordinate automatically to rebuild and redeploy your site.
The TODO demo is not production ready!
Keep in mind that the TODO example is designed as a demo and is not intended for production use. In its current design:
- There is no authentication. The app generates a unique ID for you, saved locally by your browser. However, this ID won't carry over to other browsers, or to the same browser on other machines.
- There is no abuse protection. There are no checks to limit the number of TODO items or even user accounts that a user can create.
- There is no error handling. If something goes wrong when adding or removing a TODO item, the app will spin indefinitely.
- There is no database. The app stores all TODO items in memory, which means that if the server crashes, or is spun down, or a new instance is spun up and you get connected with that one, all previous TODO items will be lost or inaccessible.
- There is no pagination. When a user visits the site, all their TODO items are fetched. The API should be updated to only fetch a subset of items at a time.
You should only consider the TODO demo as a starting point for your projects. Creating a production-ready full-stack app requires considerable effort, and the concerns mentioned above are additional reasons you might prefer to create a client-only static site instead of a full stack product.
Conclusion
Congratulations! Your Kobweb server should now be online!
If you're having trouble, you can compare your own project with mine.
This post covered the essentials for getting a Kobweb server running in the cloud.
For a complete production server experience, there's more to consider, including:
- Selecting data center(s) for deployment (to minimize latency for your users)
- Implementing user authentication, login, and logout flows
- Designing a scalable backend as your site's traffic increases
- Utilizing a decentralized database for data storage (to maintain state across server instances and crashes)
- Storing secrets (such as API keys) securely
Web service hosts (like Render, AWS, GCP, Azure, etc.) are designed to handle scaling for you! But you'll need to consult their documentation for setup guidance.
You are welcome to explore different options besides Render! However, it is left as an exercise to the reader on how to replace:
- the GitHub workflow line that pings the Render via its deploy hook URL
- the Dockerfile's use of RENDER_GIT_COMMIT, which won't be set by other services
- the Dockerfile's way to access secrets, when you are not using Render's secret file system
There's nothing like seeing your site live on the web. Thanks to companies like Render that offer a free tier for hobbyists, it's easier than ever to get started developing rich, powerful web applications.
Happy coding!
Thanks!
A huge thanks to Stevdza-San (homepage, YouTube channel) for his collaboration while experimenting with the work that became this post. He introduced me to Render, and his patience and feedback while we tested multiple iterations of attempts to get Kobweb running on Render was invaluable.